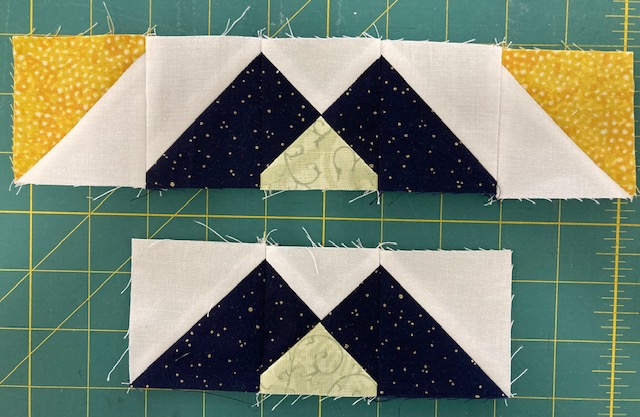
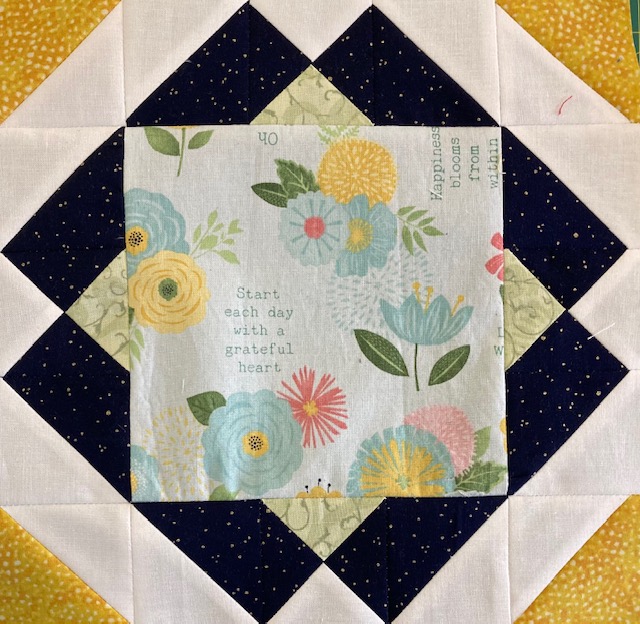
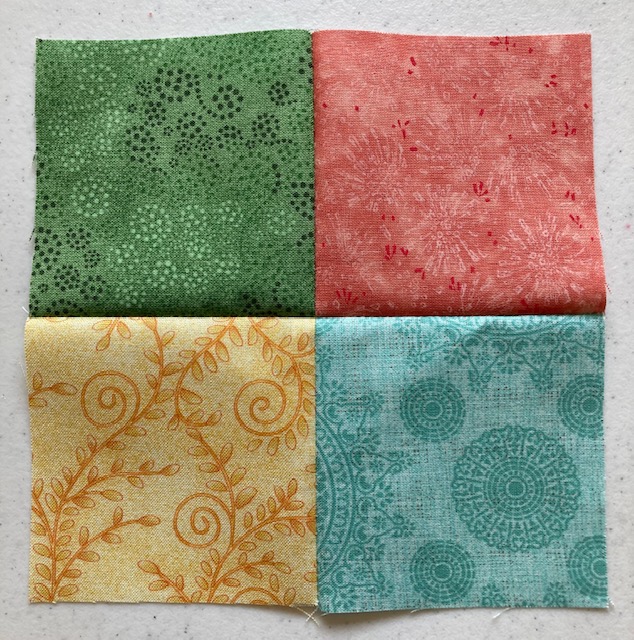
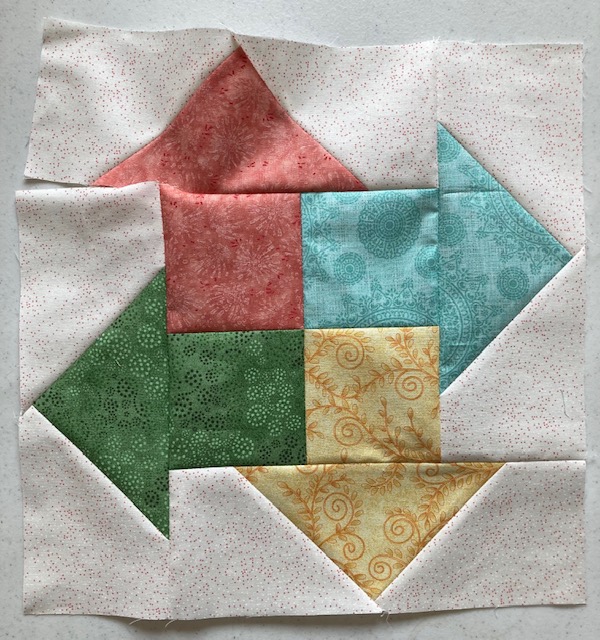
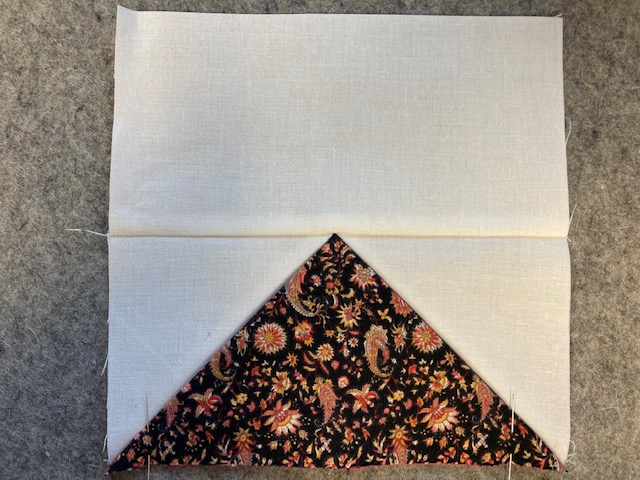
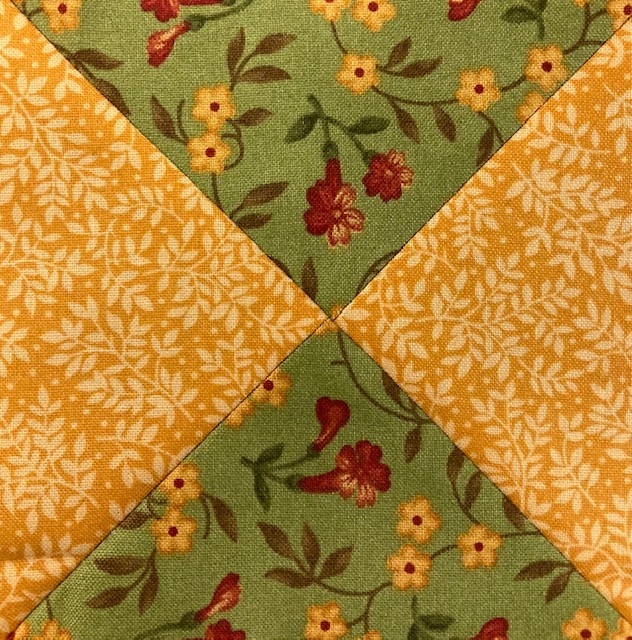
Today I am taking another run at that block I messed up in a previous blog post, and since it’s Thanksgiving weekend, I decided to feature a square of fabric that a quilting buddy gave me just because I liked it. It features a perfect quote for the season:
I fussy-cut the feature square, used my AccuQuilt die cutter to cut the other pieces pieces for this block.
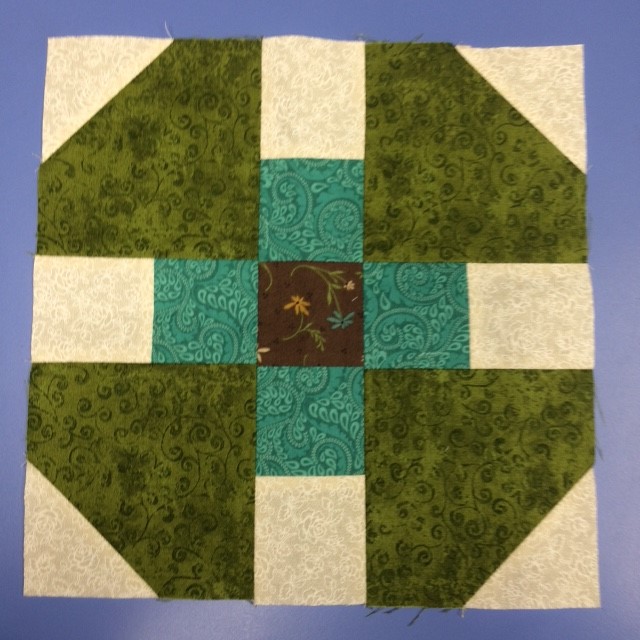
For one 10-inch finished block, you need:
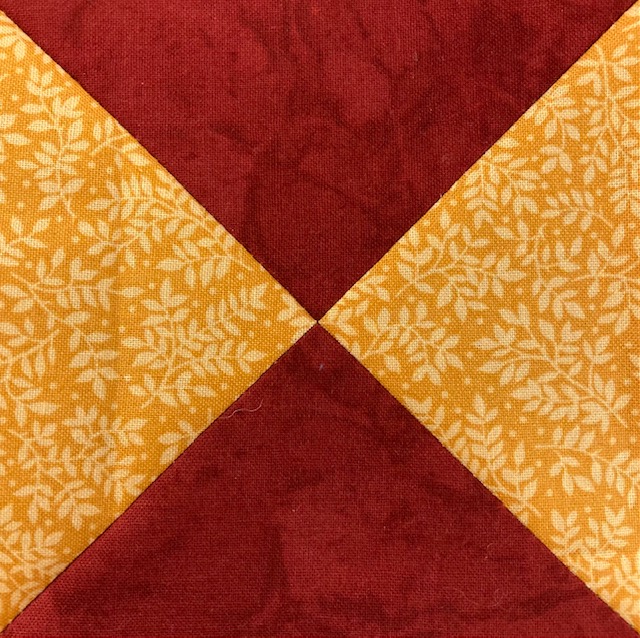
Feature: one 6.5″ square
Gold: four 2″ (finished) half-square triangles
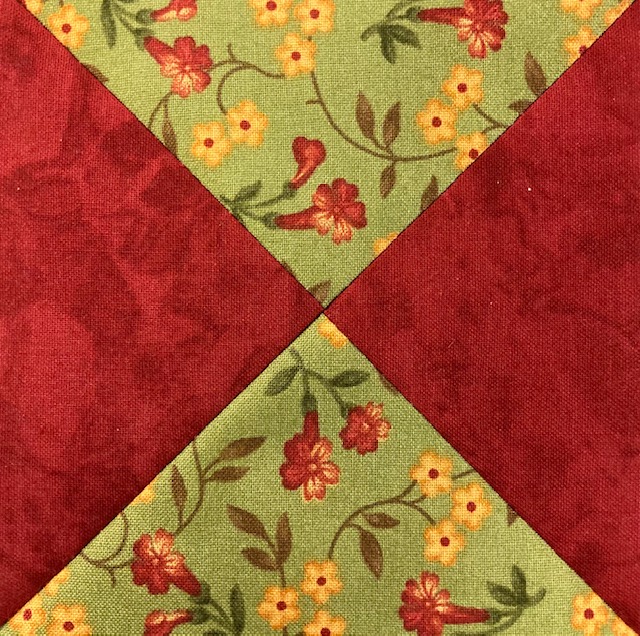
Light Green: Four 2″ quarter-square triangles
Dark Green: eight 2″ half-square triangles and eight 2″ quarter-square triangles.
White: twelve 2″ half-square triangles and four 2″ quarter-square triangles.
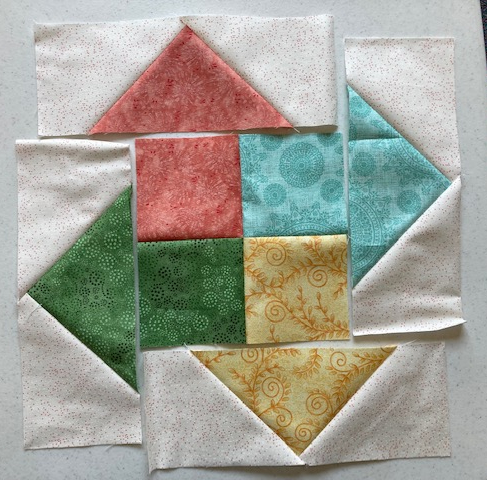
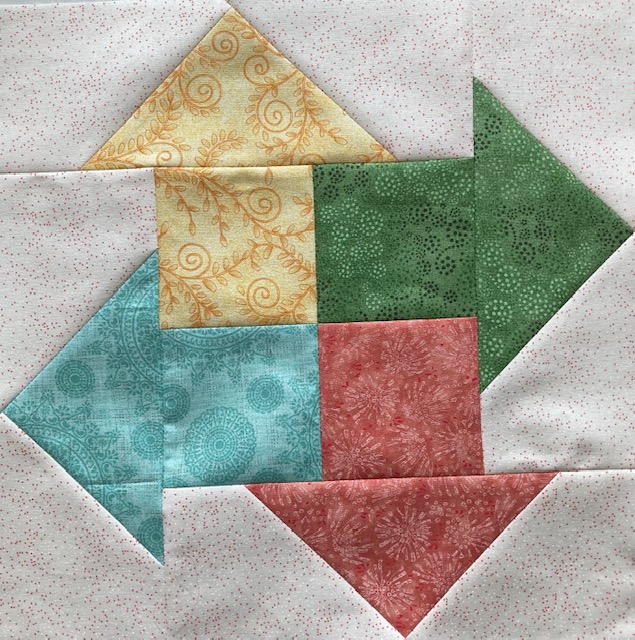
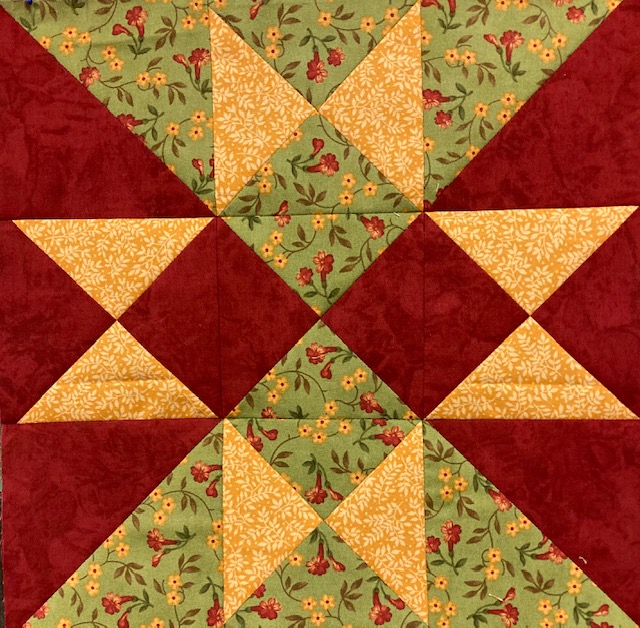
STEP 1: Sew the triangles into four quarter-square triangle (QST) units, four yellow/white half-square triangle (HST) units and eight dark green/white half-square triangle units .
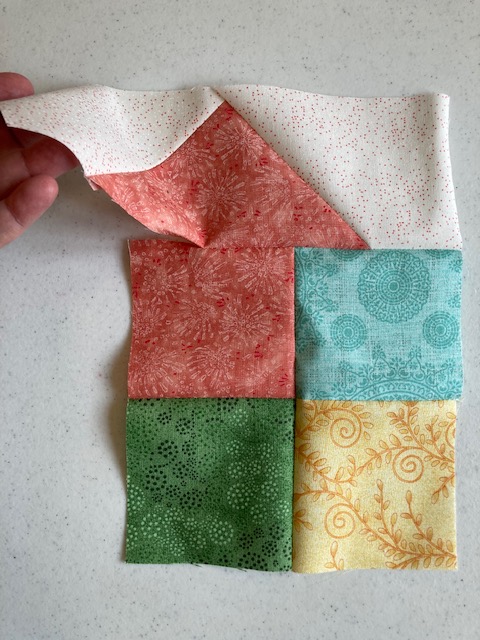
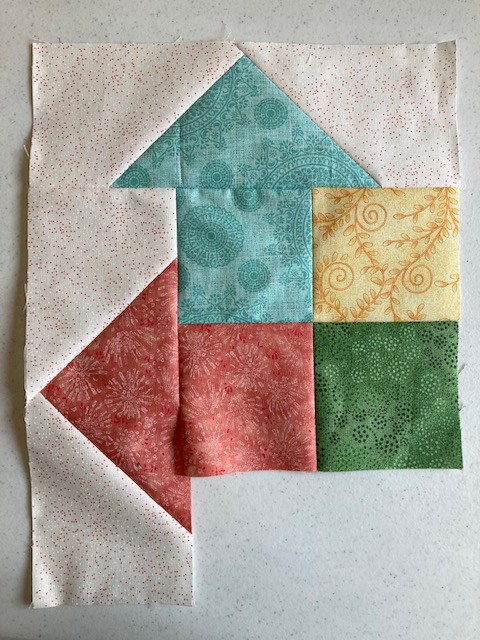
STEP 2: Sew the dark green/white HST units to the sides of the QST units as shown above, Then sew the yellow/white HST units to the ends of two of the strips.
STEP 3: Sew the shorter strips to the sides of the 6.5″ feature square.
Then sew the longer strips to the top and bottom to complete your block!
It should measure 10.5″ x 10.5″.
I called this block “Happiness” because I plan to make a bunch with fabrics that picture things that just make me smile. I don’t know what I will do with them at this point, and that’s okay. I don’t have to decide until I have enough for a quilt. Until then, Ill just make them because sewing quilt blocks makes me happy!
I hope you had a wonderful Thanksgiving, and remember to start each day with a grateful heart!
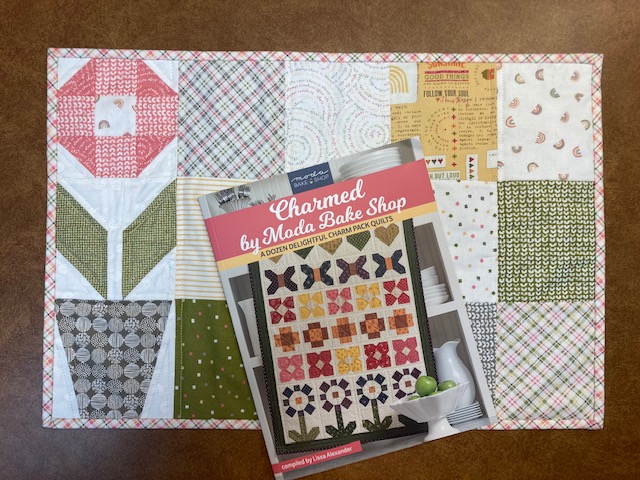
If my first book collaboration with Martingale Publishing and Moda Bake Shop seemed to take forever to arrive (and it did), the second one arrived before most of us MBS “Chefs” were ready for it! Charmed by Moda Bake Shop is in or on its way to your local quilt shop now, and this is one in a series of blog posts the chefs will be publishing over the course of the next few weeks to introduce the book. Many of us will take a project from the book and do a little something special with it.
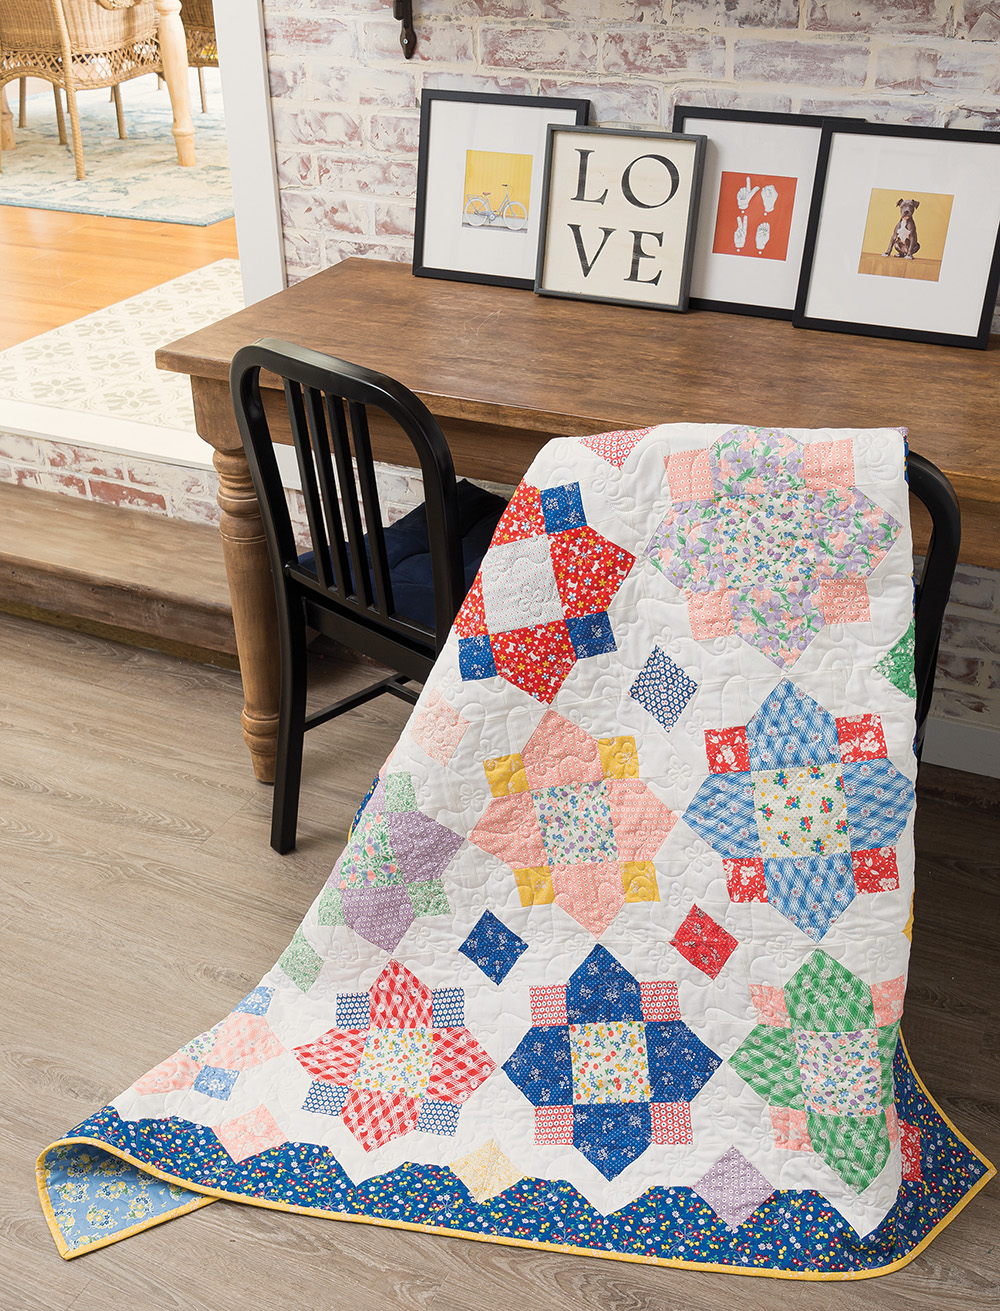
My contribution to the collection is a lap quilt I called “Cobblestones”. I used the “30’s Playtime” collection, designed by Chloe’s Closet for Moda Fabrics.
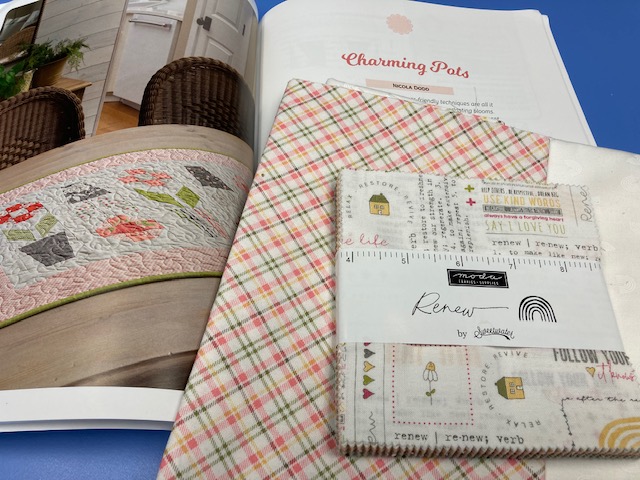
Once I got over the thrill of seeing my quilt, “Cobblestones” on the (back) cover, I opened the book, and was blown away by the variety of the projects we came up with. I found Nicola Dodd’s tablerunner most “charming”, and it is one of several projects I’ve added to my to-do list.
When I first started publishing patterns, my Mother convinced me that a tablerunner pattern should have placemats to match, so I came up with a quick placemat idea to go with Nicola’s tablerunner.
For one pair of placemats, you will need:
1 Charm Pack of 5″ squares
.75 yard (white) fabric for block backgrounds, placemat backings
.25 yard (plaid) fabric for binding
I used a Charm Pack and fabrics from the “Renew” collection, designed by Sweetwater for Moda Fabrics.
Step 1:
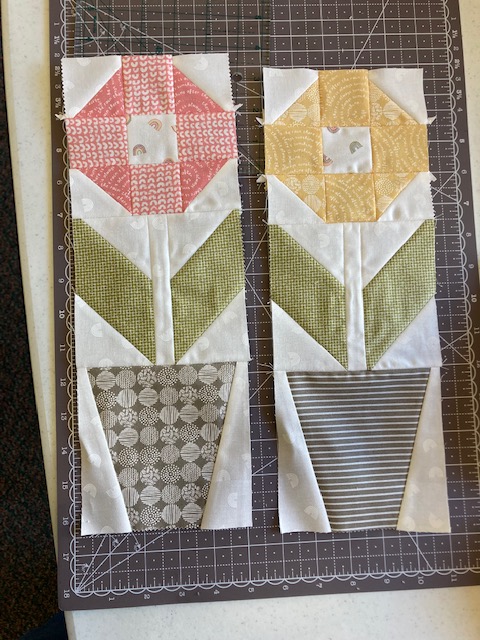
Open the Charm Pack and choose squares to make two of the flower blocks from the book. I chose two pink squares for one flower block, two yellows for the second flower block, and a white square to use for the center of both blocks. I also picked one green square for each block (for leaves) and one gray square for each block (for flower pots.) I cut one 5″ strip from the white fabric and was able to cut all the background pieces for the two blocks from this strip.
Follow the instructions in the book to make two flower blocks. They’re so “happy”, they just make me smile.
Step 2:
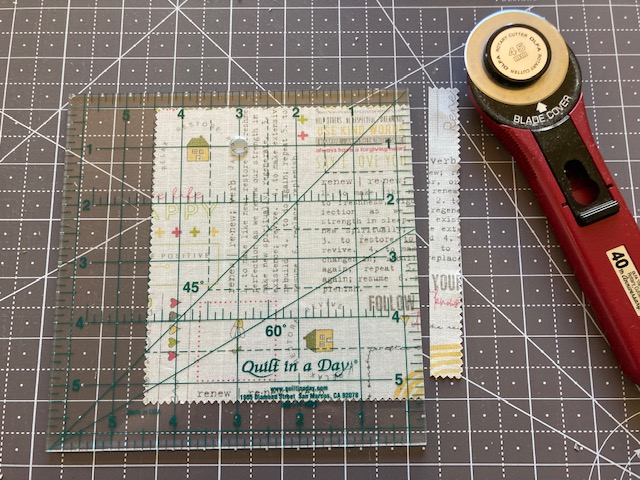
Choose twelve more 5″ squares for each placemat (24 squares total) and trim each one to 4.5″ wide x 5″ high.
Lay the pieces out in three rows, with four pieces in each row. Sew them together into a block that measures 14″ tall and 16.5″ wide.
Sew a flower block to one side of the 12-patch block. Cut batting and backing fabric slightly larger than the size of the placemat top, layer the three and hand quilt or machine quilt as desired. Cut four 2.25″ strips (or 2.5″ strips, if you prefer) of the binding fabric. Sew two strips end-to-end end-to-end and to make the binding for each placemat.
If you’d like to see all of the projects in the book, here’s a short video produced by Martingale Publishing:
If you’d like to win your very own copy of Charmed by Moda Bake Shop, just leave a comment below, and tell me which precut type, you’d like to see the Moda Bake Shop Chefs develop recipes for next. I’ll do a random drawing on Friday, October 21, 2022. You can also win a book by leaving a comment on my Facebook and Instagram posts. (Unfortunately, U.S. addresses only.)
If you like Nicola’s “Charming Pots” tablerunner, you’ll want to check out her other designs at Cake Stand Quilts.
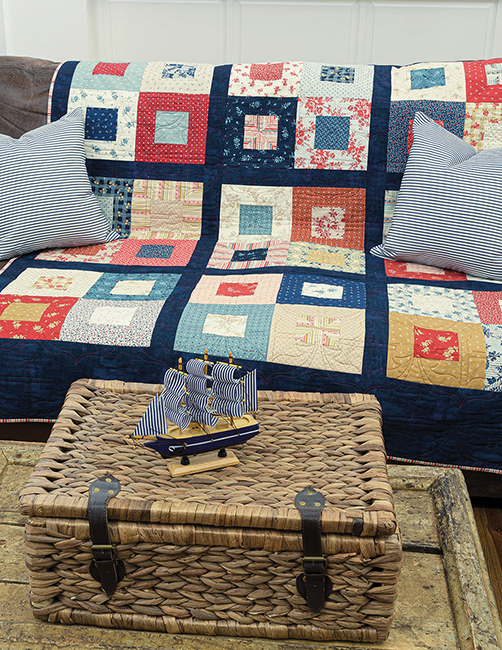
Well, it SEEMS that long ago that Moda Fabrics and Martingale Publishing sent out a call to Moda’s Bake Shop “Chefs” to submit quilt patterns using Moda Jelly Roll® strips. As it happened, I had one in hand, and I had made the prototype with one of Moda’s collections, so I submitted it, and it was accepted!
My pattern, one of a dozen in the newly-published Rolling Along, is called “Storm Warning”, and the sample was made with a Jelly Roll of Minnick & Simpson’s “Northport” collection. The sashing and borders are Basic Grey’s “Grunge” basic in Peacoat Blue.
My quilt guild holds a weekend retreat on Sew a Jelly Roll Day each September, and several of my friends tested the pattern. I thought you’d like to see the pattern in different colorways:
Lori
Yvonne
Cheryl
Annette used 2.5″ strips from her stash, and added another row of blocks to make her quilt larger. (Note: A Jelly Roll only gives you enough strips to make the lap size in the book)
Martingale Publishing recently posted a trunk show video featuring all the quilts in the book:
After watching the video, I’m sure you’ll want the book, so, I’m giving away three copies. Leave a comment on this blog post for one entry. Tell me which quilt you would make FIRST. No extra credit for picking mine. ;0)
There will also be giveaways on my Instagram and Facebook pages. Just follow the links, and if you want to follow my blog and/or IG and FB accounts, that would be lovely, too! All winners will be chosen by random drawing on Wednesday evening, June 22.
Rolling Along is the latest in a series of Moda Bake Shop books, edited by Lissa Alexander and published by Martingale Publishing. Look for them at your favorite local quilt shops. If you don’t see them, be sure to ask for them!
I don’t remember the last time I was bored, especially when it comes to quilting. I have more projects in various stages than I can remember, and more ideas in my brain and sketchbook than I’ll ever get around to making. It seems I spend a lot of time trying to decide what to work on next! So, this block idea sums me up pretty well, and to be honest, I thought it up in one of those moments when I was trying to decide which on-a-deadline project I would work on next.
“All Directions” is a 12″ finished block. For each block, you will need:
4 prints – one 3.5″ square and one 3.5″ x 6.5″ rectangle of each.
Background – eight 3.5″ x 5″ rectangles
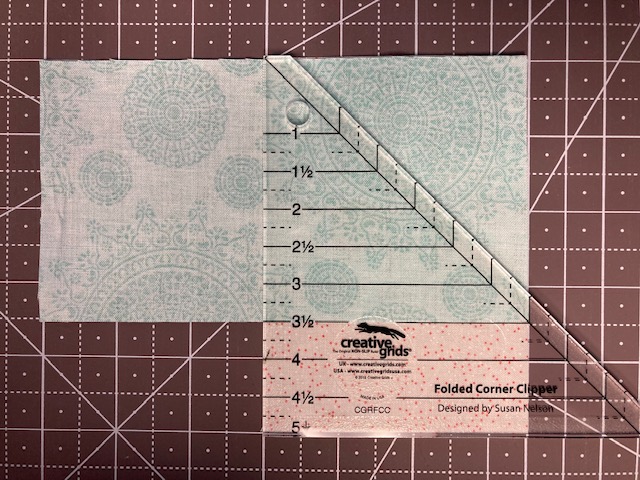
To make this block, I also used the Creative Grids® Folded Corner Clipper tool. It allows me to skip the step of marking a diagonal sewing line when making the “stitch-and-flip” flying geese. I don’t know that it saves much time, but I’m a gadget geek, so I had to get one. I like it, but if you’re not comfortable sewing bias edges, it may not be for you.
STEP 1: Make the Flying geese pieces
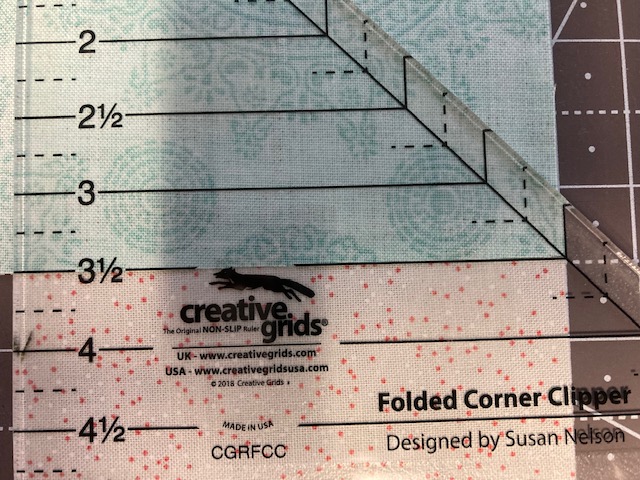
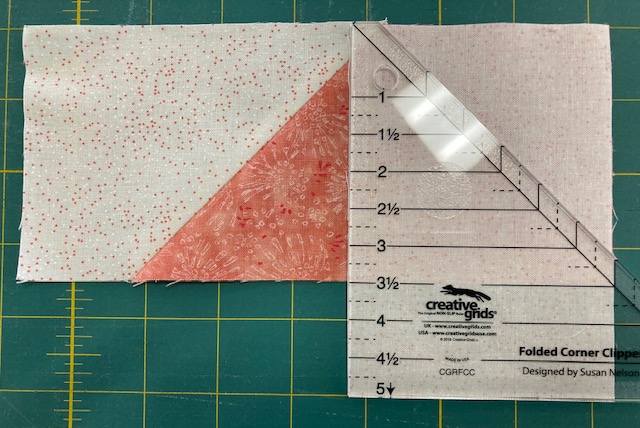
Lay a background strip down, face up and vertically. Lay a print rectangle face down and horizonally, as shown above. Align the top and right edges. Lay the tool on the corner area. Note that the 3.5″ line is along the bottom of the blue rectangle, and the corner fits into that little “hook” on the tool. Trim away the corner and sew the edge with a 1/4″ seam.
Open and press the seam. (The print rectangle probably won’t change color on you. )
To do the other edge, lay the piece you just made right side up and horizontally, then lay a background rectangle face down and vertically, aligning the top and right corners again. Use the tool to trim away the corner, and sew the seam.
Repeat with all of your print and background rectangles.
STEP 2: Make the center 4-Patch.
Use the 3.5″ print squares to make a 4-patch.
STEP 3: Here comes the fun part!
Lay the 4-Patch down, and lay the flying geese strips around it as shown, matching the prints. We’re going to use a partial seam technique to sew the strips to the 4-patch. It’s not hard, I promise.
The whole secret is this first seam. Align the right edge of the pink flying geese strip with the right edge of the blue square. Starting at the right edge, sew the seam, STOPPING about an inch from the left edge of the pink square. We’ll just leave that end loose for the time being. Press just the blue/white section of that seam.
Now when you lay the blue geese strip on the block, you can sew the entire seam!
Repeat with the yellow and green geese strips. See where this is going? Now you can go back and finish sewing that first seam on the pink geese strip. Clever, yes? Note: It’s a good idea to overlap a few stitches when you sew that last seam.
Give it a good pressing and you should have a 12.5″ “All Directions” block.
****************************************
If you like this block, feel free to share this post on social media, and please, click the “Follow” button at the top of the post to be notified whenever a new post goes live. It doesn’t happen as often as I would like, but there’s almost always a block or quilt pattern for you.
Meanwhile, check out my Facebook Page and Instagram (I’m still trying to get the hang of IG.)
Be watching for an upcoming blog post on Rolling Along a new title just published by Martingale Publishing, and featuring a dozen Jelly Roll quilt projects “baked up” by the Moda Bake Shop Chefs, including me. You might even win a free copy of the book!
My quilting buddy, Annette, has been preparing to do a presentation for our quilt guild on Dimensional Curved Piecing, a technique popularized by Annette Ornelas of Southwinds Designs. (Follow that link to visit her website and see the amazing patterns she has created.) But I digress.
Since I am on “staycation” this week, and I talked my friend Annette into doing the demonstration, I felt obliged to come up with a few samples for her. I’ve been toying with ways to use the DCP technique to “dress up” traditional quilt blocks.
Here’s what I have for you today.
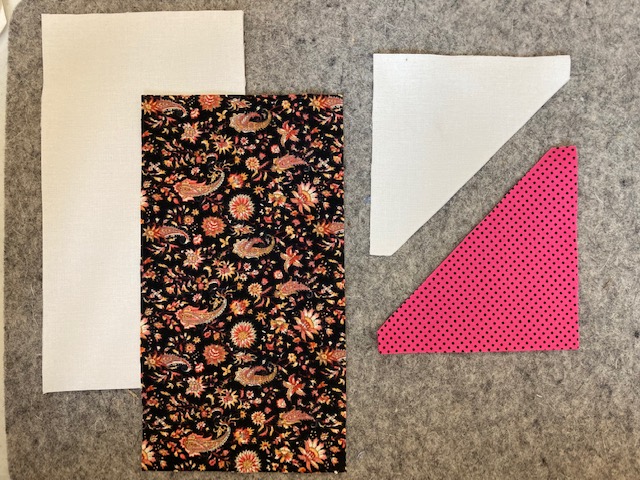
To make this block, you will need:
Background: Four 3.5″ x 6.5″ rectangles, and eight 3.5″ half-square triangles. (I used my AccuQuilt cutter for this project)
Pink: Eight 3.5″ half-square triangles.
Brown: Four 3.5″ x 6.5″ rectangles.
STEP 1: Sew the pink and background triangles into squares. Fold a brown rectangle in half, wrong sides together.
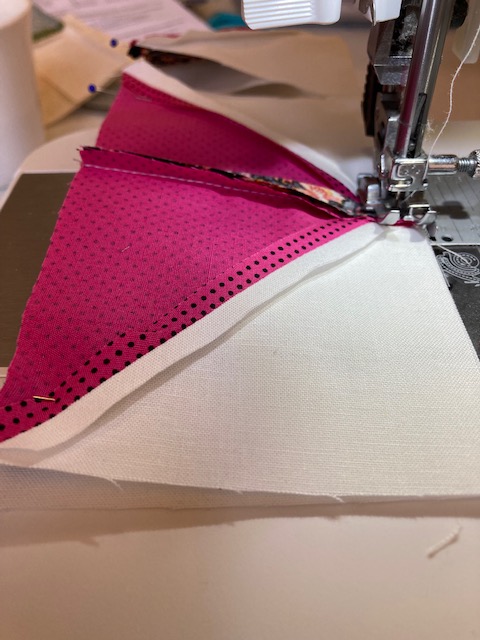
Step 2: Sew the triangle squares as though you’re making a Flying Geese unit, catching the folded brown rectangle in the seam. The fold in the brown rectangle is at the top in these photos. Notice it does not extend into the seam allowance at the top of the piece.
Open the unit out, and open out the brown piece so it covers the pink triangles.
Pin the bottom corners as shown and press.
Step 3: Sew the 3.5″ x 6.5″ background rectangles to the top edge of the Flying Geese units.
You should have four units that look like this.
Step 4: Sew the units into a pinwheel.
The sides of the brown triangle will be loose, and because they are on the bias, you can gently roll them back into a curve. using a matching thread, carefully (slowly) topstitch the curved edge to hold the curve in place.
If you’re like me and do better with a live tutorial than with written instructions, watch this short video on the Southwind Designs YouTube channel.
I have a couple more ideas I’ll show you on my Facebook page, One is an adaptation of the Rocky Mountain block, and the other is a tweaked version of the block I showed you a few years back in the post “Controlling the Chaos.”
I’ve got some exciting news to share. A while back (like nearly a year and a half!) I was chosen to contribute a Jelly Roll pattern to a new book just published by Moda Fabrics and Martingale Publishing! It’s called Rolling Along designers are going to be giving away copies of the book over the next few weeks. I’ll have details for you soon. Meanwhile, you can probably find it at your local quilt shop.
Last winter, I did a silly thing. I tripped over my office chair – WHO does THAT? -, fell and partially separated my shoulder. Very painful, but it could have been a whole lot worse. No surgery required, but it took the better part of the year to heal fully. During those months I couldn’t do a lot of rotary-cutting, so I really leaned on my AccuQuilt GO die cutter, which meant tailoring my designs to shapes that are available.
How many times have I encouraged you to PLAY with your fabric scraps? Well, that’s what I’ve been doing, and I have several blocks to share with you in 2022!
Consider this block pattern a little Christmas gift.
For the Christmas Star Block, I used the 3″ (finished) Half-Square Triangle and Quarter-Square Triangle dies to make a 9″ (finished) star block. You could also make this a 6″ block by using 2″ dies, or use the 4″ dies to make a 12″ block.
For each block you will need:
Gold fabric:
8 Quarter-Square Triangles
Green Fabric:
4 Quarter-Square Triangles and 4 Half-Square Triangles
Red Fabric:
4 Quarter-Square Triangles and 4 Half-Square Triangles
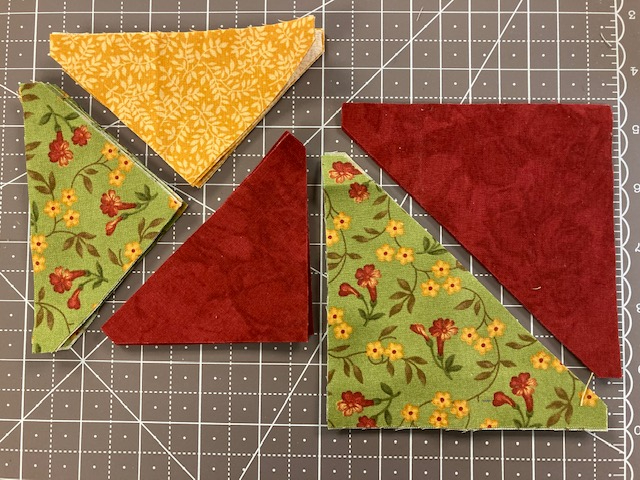
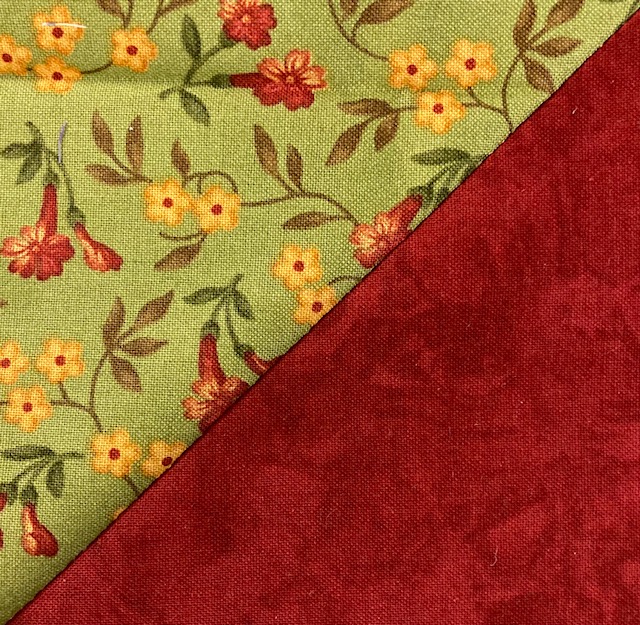
Make 4 Red/Green Half-Square Triangle units.
Make 2 Green/Gold Quarter-Square Triangle units.
Make 2 Red/Gold Quarter-Square Triangle units.
Make 1 Red/Green Quarter-Square Triangle unit.
Lay your units out as shown. Sew into three rows, then sew the rows together to complete your Christmas Star block!
I think this would be a great scrap quilt, whether you stick with the red-white-gold color scheme or use every color in your scrap pile! In fact, the Muse is stirring, and I am seeing several possibilities in the back of my brain. I think I’ll go spend some quality time with QuiltPro.
Meanwhile, I leave you with an Irish Christmas Blessing I came across earlier today:
When working with the pre-cut scraps in my Thrifty Quilter system, I make a lot (a LOT) of Stitch-and-Flip corners. After thousands of of them, I was over drawing that diagonal line. One day I discovered I could layer the pieces, put my ruler down with the 1/4″ line on the diagonal points, cut that triangle away, then sew the seam and press the corner open.
Then Doug Leko of Antler Quilt Design came out with a new tool he calls the Mini Simple Folded Corners. First, it’s a new gadget, and I am a gadget geek. Second, it resembles a tool idea that was simmering in the back of my mind. So, I bought one, and decided this 10″ block I call the Blooming 9-Patch would be a perfect block to demonstrate it.
For each Blooming 9-Patch, you will need:
Four 4.5″ green squares
Eight 2.5″ beige squares
Four 2.5″ teal squares
One 2.5″ brown square
Step 1- Use the Stitch and Flip method to put a 2.5″ beige triangle corner on each of the 4.5″ green squares. I laid the beige square on the corner of the green square, then laid the tool down so that the 2.5″ lines lined up with the left and bottom edges of the beige square, and the printed diagonal line (which indicates my seam line) ran diagonally from the upper left to lower right corners. I cut away that triangle, sewed the seam and pressed the corner open. Again, this is not the way the tool was designed to work, but it worked for this block.
Step 2 – Sew the 2.5″ teal squares to the remaining 2.5″ beige squares.
Step 3 – Sew two rows with a teal/beige pair sandwiched between two green/white squares. Sew the other teal/white pairs into a strip with the brown square between the two teal squares.
Step 4 – Sew the row of squares between the other two rows to complete your Blooming 9-Patch block!
The block, unfinished, measures 10.5″ x 10.5″. I have a plan for it in my sketch book, which should make use of a layer cake I have left over from my stint as an Island Batik Ambassador. It’s on my To-Do list, but a ways down the list right now.
I have a classic block coming up next here on Seams Like a Plan.
Was anyone really given that first-day-of-school writing assignment? I don’t recall ever doing it, but I recall the phrase being a meme long before anyone had ever heard the term meme. I digress.
Part of my summer was spent helping the Moda Bake Shop cook up a quilt-along (QAL) sampler project called “At the Seashore.” If you weren’t a part of the fun, on the title and you can find all of the blocks offered and a few layout options. Some of the blocks contributed by my fellow Moda Bake Shop “Chefs” are absolutely awesome. My own contributions were a paper-pieced block, the Sailor’s Star, and a simple setting option I called “Calm Sea.”
There’s nothing I enjoy more than designing quilts and quilt projects, but a close second would be seeing photo after photo of my design in every color combination imaginable. Several of the quilters – we call them Moda Bake Shop “Bakers” – who took part in the quilt-along gave me permission to share photos of their Sailor’s Star blocks:
This slideshow requires JavaScript.
The Sailor’s Star was the only paper-pieced block in this year’s QAL. Of course, any time you’re sharing a pattern with templates – whether they’re individual pieces or paper-pieced units – you have to be very careful that the printout from your computer printer or photocopier is accurate. So it’s a good idea to print a test page, measure the templates and adjust your printing size to get the result you need. In the case of this block, even through my publishing software showed my template illustration was the correct size, I had to set my printer for 104% to get the printout right.
A couple of MBS Bakers had to deal with blocks that were just not quite perfect, and came up with successful solutions.
Marcy Heglund Henri’s block was a little shy of 12.5″ square, so she added a narrow border to it.
Linda Peimann Miller wound up with corners that were just a little too rounded, so she added the triangles to the corners to sharpen them up, and between you and me, I think it really improved the block overall.
The “Calm Sea” setting was the simplest of the three setting options offered up by the MBS Chefs this summer. That’s not to say it was without its challenges. Because the blocks were set in vertical rows, the sashing strips between the offset rows were cut lengthwise, which meant the fabric had to be folded twice to cut it. Those folds had to be perfectly parallel to each other to avoid “doglegs” at the folds.
Here are photos of some of the “Calm Seas” quilts that Bakers have shared with me:
This slideshow requires JavaScript.
Again, Bakers found a way to add their own touches to the setting. Frankie added seashore-themed prints to the ends of the rows, and Raylene appliqued starfish in the larger areas of the background. The pattern as written was 60″ x 82″, which is just shy of twin-size. Paula added two more rows to make her quilt wider.
I don’t know how many quilters took part in the “At the Seashore” QAL, but I know they all had fun. And I also know that the Moda Bake Shop Chefs are back in the “kitchen” working on our next QAL, the 2019 Countdown to Christmas. We’ll offer up one block per day, and each will be offered in two or three sizes. The Countdown to Christmas begins on December 1st. Stop by the Moda Bake Shop blog each day for a downloadable pattern!
My go-to high school graduation gift is a pillowcase. It’s easy to make, and you can customize it for the recipient. (I like to point out that it also makes a good laundry bag.) When a co-worker’s daughter graduated last spring, she had already decided she was going to decorate her dorm room in llamas and turquoise. I was tickled when I found the perfect llama print.
I had enough left from the pillowcase to add a few 6.5″ squares to my Thrifty Quilter bin. At a recent retreat weekend, I played with an idea for a 10″ quilt block. That explains the first part of this post’s title. The rest will be clear shortly.
Here are the TQ pieces needed for this block:
One 6.5″ square Novelty Print
*Two 3.5″ turquoise squares
*Six 3.5″ brown squares
*Eight 3.5″ white squares
Step 1:
Cut two 3.5″ brown squares and two 3.5″ white squares diagonally twice, and sew into four quarter-square triangles (QSTs). Trim each one to 2.5″ square. Unaffiliated endorsement: If you don’t have one, get yourself a Tucker Trimmer®. If your local shop doesn’t carry them, you can order direct from Studio 180 Designs.
Step 2:
Cut the remaining brown squares, white squares and the turquoise squares in half diagonally. Sew into eight brown and white half-square triangles (HSTs) and four turquoise and white HSTs. Trim each to 2.5″.
Step 3:
Sew a brown and white HST to the brown sides of each QST as shown.
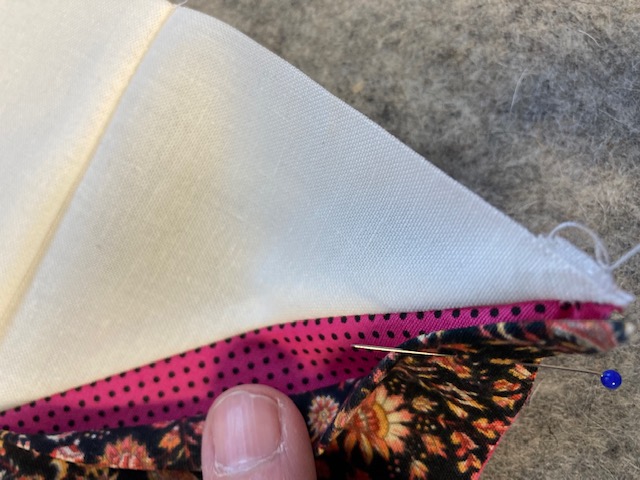
Just so you know, this is where I made my boo-boo. We’ll see if you can figure out what I did.
Hint: I did steps 1 & 2 on one day, and step 3 a few weeks later.
Step 4:
Sew a strip to the left and right sides of the 6.5″ novelty square. Sew the turquoise and white squares to the ends of the other two brown and white strips, and sew these to the top and bottom of the center unit to complete your block.
“Corral” – 2019
So now you see my mistake. Actually, it’s an honest mistake that I made worse by not addressing it immediately.
Here’s what happened:
I was using a machine that has a little quirk. Even though I have a quarter-inch presser foot, I still have to move the needle three positions to the left to have a true quarter-inch seam. Of course, I turned the machine off at the end of the first day of the retreat, having finished Step 2. When I switched the machine on the next time, the machine went to its default settings, and I forgot to bump the needle over before beginning Step 3. That was my first mistake.
When I sewed strip to the left side of the llama square, I noticed that it didn’t fit. I should have unsewn that seam, measured the strip and figured out why it was too long. (Because I didn’t move the needle, my seams when sewing the HSTs to the QSTs were too narrow.) That was my second mistake.
Instead of addressing the problem, I told myself “it won’t be that noticeable”, and simply trimmed the end off flush with the larger square. That’s was my third mistake, and for this block, the fatal error. I know better than that! For pity sake, I’ve been doing this for over 40 years. I have no excuse.
I will forgive my quilty friends if they snicker when I say, I am not a “point prude.” I know all quilters are human, and imperfect points happen to us all, but this one will haunt me for a while.
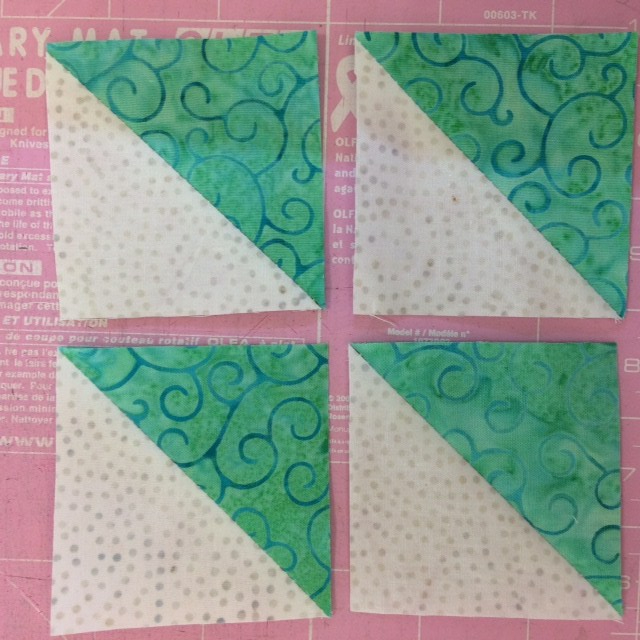
For the Island Batik Ambassadors “Try It” Challenge, I’m pleased to share a technique for making half-square triangles (HSTs). I wish I had thought of it, but all of the credit goes to Beth Helfter of EvaPaige Quilt Designs. I honestly cannot recall how our quilting paths first crossed, but we are both former members of the Quiltmaker Magazine “Scrap Squad” and both of us have more or less built our design careers around scrap quilts.
The blue star block is in the book. The gold block is not.
The most common way of making HST units is to begin with two squares, draw a diagonal line on one, sew 1/4″ on both sides of the line then cut on the drawn line. This gives you a pair of identical HSTs. But Beth wanted each HST in her project to be unique. She could have just cut all of the squares diagonally and mixed them up, but then she’d be dealing with all of those bias edges. Her solution is nothing short of genius. She calls it Accordion-Sewn HSTs. She even wrote a book about it!
Because this is Beth’s technique, and because it’s one that’s easier to understand if you see it done, I encourage you to take a few minutes to watch her tutorial videos:
I was intrigued, so I ordered the book and whipped up a quick star block. That’s all it took, and I was hooked…and looking for other scrap blocks I could use the accordion technique on. The first one I came up with was the “O, Scrap!” block.
The square stack for “O Scrap!”
“O Scrap!” 12″ block
I should note that all of the scrap fabrics used in this post are Island Batik prints.
I really like that blue star block from Beth’s book, but I don’t like the big “blank” space you get when you set the blocks side-by-side. I decided to try to add dark triangles in the corners. The challenge with this block, which I called “O, My Stars”, was figuring out how to stack my squares so I’d wind up with the specific combinations I needed.
The square stack for “O My Stars”
“O, My Stars” 12″ Block
I have big plans for that block, so I cut a mess of my Island Batik scraps into 4.5″ squares with my AccuQuilt Go! die cutter. It’s going to be an ongoing scrap project for a while, though, because I got another bright idea.
I had most of a 10″ stack of the Island Batik “Lavendula” collection left over from my February miniature quilt project, so I cut all of those squares into 5″ squares and made a modern-style lap-size quilt .
“O, Scrap!” 16″ Block
Two side strips
I made three 16″ “Oh, Scrap!” blocks. I considered renaming the larger block “The Big O”, but chickened out. Beth would’ve done it. I also made two extra side strips. I sewed the blocks and extra strips into one long row, then added a 16.5″ wide strip across the top and a 40.5″ wide strip on the bottom. The result will be a 56″ x 72″ scrap quilt. The binding will be either teal (more likely) or purple.
All fabrics in this post were supplied by Island Batik Ambassador sponsors. The project is sewn with Aurifil thread, and the batting is Hobbs Heirloom Cotton blend. AccuQuilt has GO! dies for both the 4.5″ and 5″ squares I used in this project.
Have I convinced you to try the Accordion HST technique? You’ll want to order your very own copy of Oompah! or the technique sheet from EvaPage Quilt Designs. You may want to check out her Facebook page as well. Do me a favor and tell Beth you heard about it here on Seams Like a Plan. Pretty please?


 Lori
Lori Yvonne
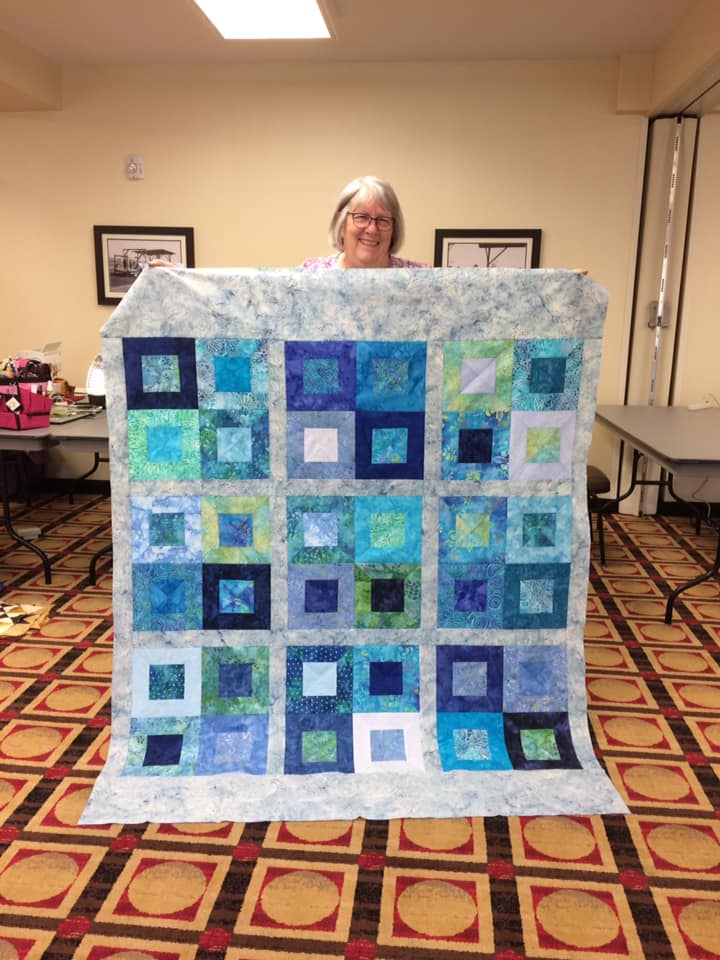 Cheryl
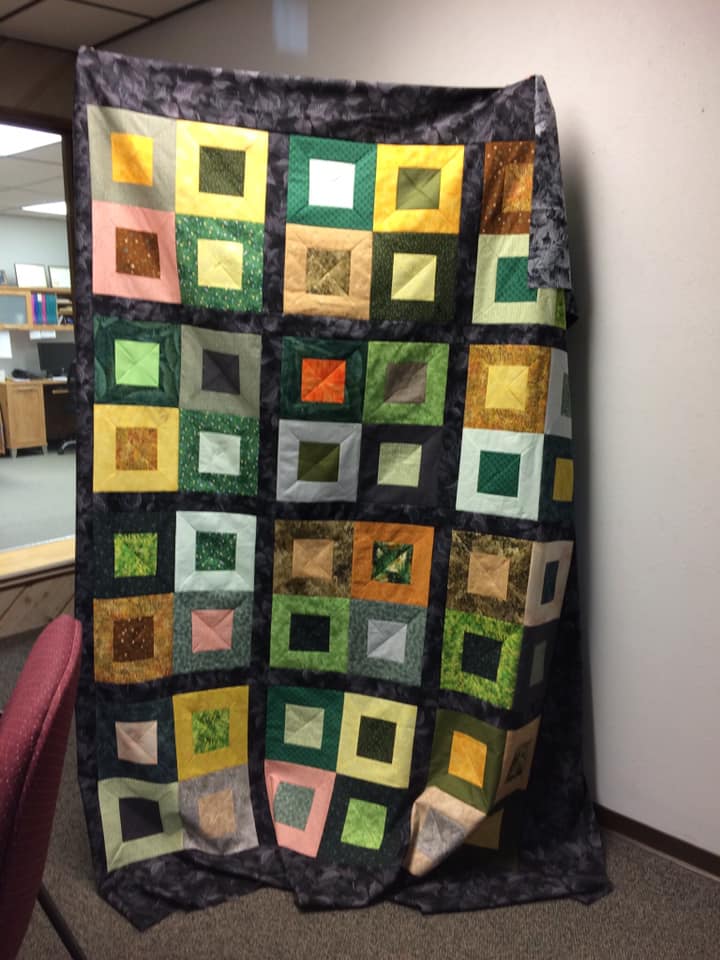 Annette used 2.5″ strips from her stash, and added another row of blocks to make her quilt larger. (Note: A Jelly Roll only gives you enough strips to make the lap size in the book)
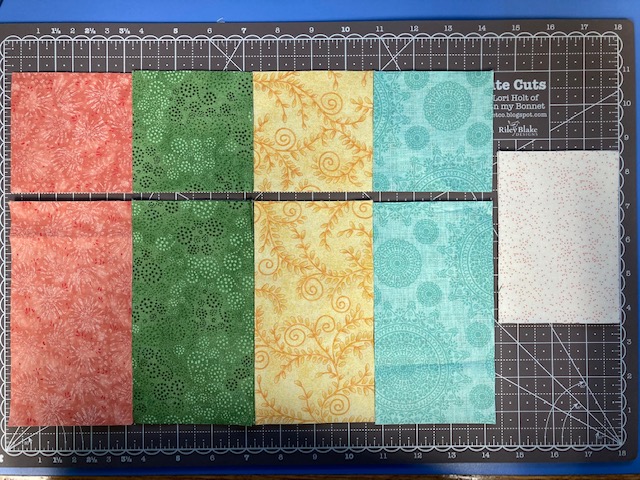


 When working with the pre-cut scraps in my
 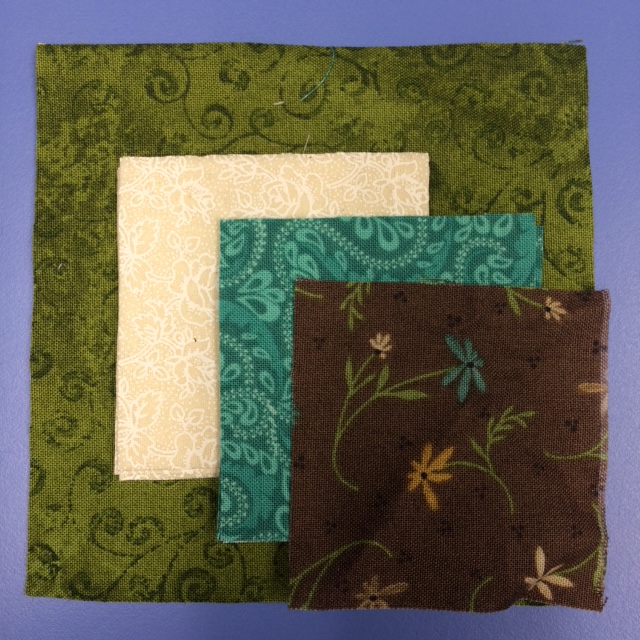 For each Blooming 9-Patch, you will need:


 Part of my summer was spent helping the

 Here are the TQ pieces needed for this block:

 Cut the remaining brown squares, white squares and the turquoise squares in half diagonally. Sew into eight brown and white half-square triangles (HSTs) and four turquoise and white HSTs. Trim each to 2.5″.
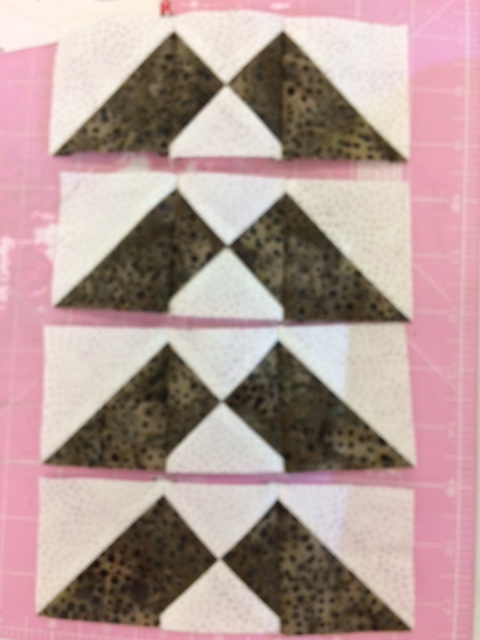 Sew a brown and white HST to the brown sides of each QST as shown.
 For the Island Batik Ambassadors “Try It” Challenge, I’m pleased to share a technique for making half-square triangles (HSTs). I wish I had thought of it, but all of the credit goes to Beth Helfter of
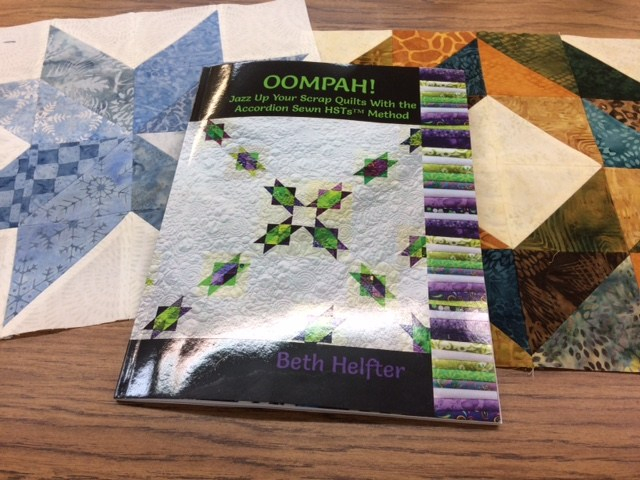
")
")